Do you ever wonder what code is running the web pages on your browser? If so, this post will give you a brief introduction to how to view your website’s source code. This article will provide helpful tips for navigating and understanding the different principles used in HTML, CSS, and JavaScript. It also covers where to find these codes if you’re not quite sure of where they are! Once armed with this knowledge, you’ll be able to see how your favorite websites work under the hood – or even make changes yourself!

To read your website’s source code, right-click “view page source” or press CTRL+U (Mac: command+u).
Table of Contents
A guide on how to View Source Code on a Website and Why it’s Important
Viewing your HTML source code is a great way to quickly identify and troubleshoot issues with your website It also gives you insight into how competitors structure their websites.
Search engines read source code to determine where your web pages should rank in search results.
If you are paying someone to manage your SEO, it’s a great way to keep tabs on them.
This short guide will teach you how to read the source code and make actionable changes.

How to View Source Code
The first step in viewing your source code is opening a web browser of choice and going to the webpage you want to read. Below are the commands to open source code viewing.
Keyboard Shortcuts
PC Computers (Microsoft/Windows)
- Firefox – press
CTRL+U. Or you can go to the Mozilla Firefox menu and click on “Web Developer” and then “Page Source.” - Internet Explorer –
CTRL+U. Or right-click and select “View Source.” - Chrome –
CTRL+U. Or you can select the dropdown menu (hamburger) in the right-hand corner, clicking on “Tools,” and select “View Source.” - Opera –
CTRL+U. Or right-click on the web page and select “View Page Source.”
Mac Computers

- Safari –
Option+Command+U. Or right-click on the webpage and select “Show Page Source.” Ensure you have developer tools enabled in Preferences. This will activate the develop menu in Safari. - Firefox –
Command+U. Or right-click on the page and press “Page Source.” You can also find it under “Tools” in the menu, pressing “Web Developer” and click on “Page Source.” - Chrome –
Option+Command+U. Or right-click on the page and select “View Page Source.” You can also navigate to “View” in the menu bar and then click on “Developer” and pressing “View Source.”

To find items in the source code, press CTRL+F (for Find) to quickly scan your source code for Search Engine Optimization, web design, and troubleshooting errors.
What to look for in the Source Code:
Title Tags
Start with the top of the page and attract people to your website in the SERPs (Search Engine Result Pages).
The title tag is what people first read in Google Search; it gives them an idea of what your page is about and why they should click on it. It’s a tiny billboard in search results, so you want to craft your words carefully.
The opening tag designates the start of the title tag: <title>. It ends with the closing tag: </title>. The title tag is usually near the top of your source code in the <head> section.

The content inside the title tag typically matches what is used in the headline of Google search results.
If you want a page to rank for a specific term, you need to have that keyword in the title. It is crucial to have unique titles; duplicate titles only confuse search engines on page intent.
There’s one last thing to remember: every webpage on your website should have a unique title tag. Never duplicate this content.
Automating the Process
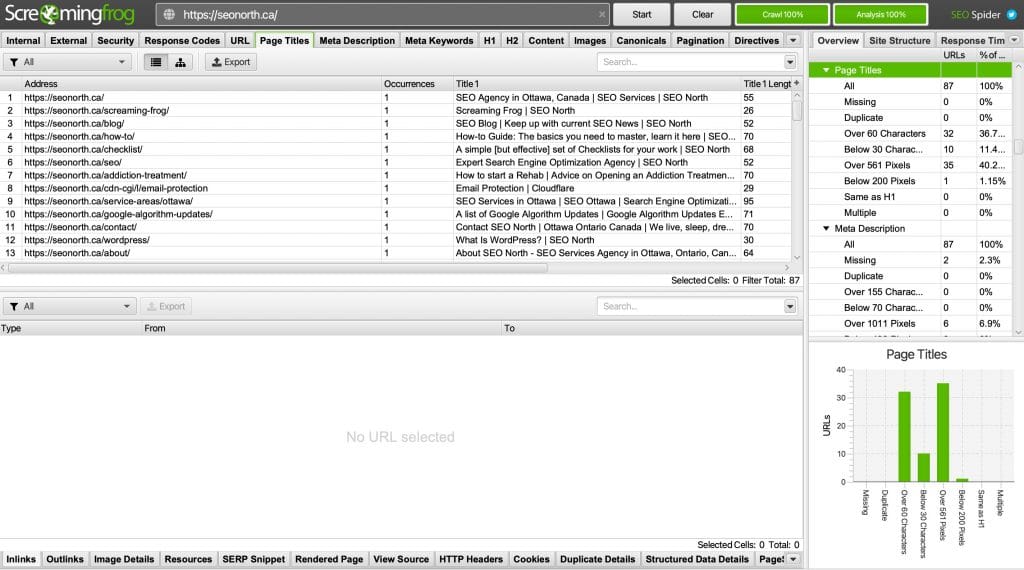
To automate this process, you can use a free application called Screaming Frog. Screaming Frog scans your website (up to 500 pages on the free version), allowing you to identify duplicates quickly, find titles over a specific word count and missing tags in a matter of minutes.

Meta Descriptions
If Title Tags are the billboards of search results, then Meta Descriptions are the advertising copy. Your copy needs to be written to engage readers to click on your blue link; the issue is, you need to do that within 160 characters.
Most websites forget to add meta descriptions, so Google adds or rewrites over 60% of meta descriptions. Adding descriptions allows you to beat the competition and make your website stand out.
Meta Descriptions are a little more challenging to find with so many “meta’s” in the source code. To see your description, search for <meta name="description">

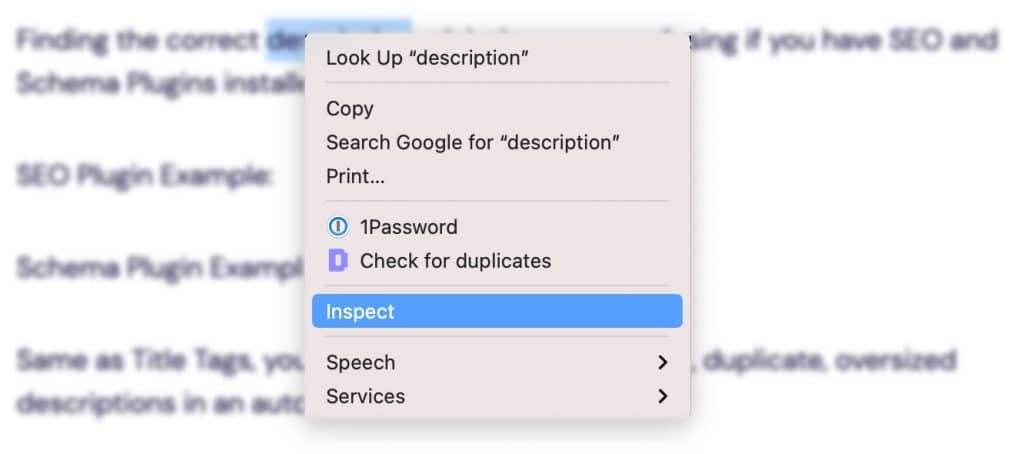
Finding the correct description might become confusing if you have SEO and Schema Plugins installed.
SEO Plugin Example:
You will notice <meta property="og:description"> to tell Facebook and Twitter what to pull for the post descriptions.

Schema Plugin Example:
Schema tells Googlebot and BingBot crawlers important information about your page.

Same as Title Tags, you will want to check for missing, duplicate, oversized descriptions in an automated Screaming Frog audit.
H1 Headings
H1 tags are your page titles; it’s what people read first when they land on your page; you want to make it compelling and descriptive, or people will bounce and go somewhere else.
You should only have one H1 per page; HTML5 now accepts more than one H1 tag, but try to keep it down to one per page.
It’s also important not to stuff your H1 with too many vital fraises that will look unnatural to readers and could penalize you in Google’s algorithm.
You can find your H1 tags by searching for <h1 in the code.

Links
You have several options when it comes to link types.
Follow Links
There is no attribute for “do follow” links, so every link is followed unless otherwise stated.
NoFollow
Nofollow is an attribute you can add to internal links that tell search engines not to follow that link. In the past, this attribute was primarily used for PageRank sculpting; you will notice no-follow links by the rel=nofollow.
USG
User-generated (USG) links have been created by users with written access to your website. This user-generated link is typically added to community forums. You can find these links by searching for rel=usg
Sponsored
If a person or business has paid you to add a link to the page, you must declare this is a sponsored link by adding. rel=sponsored
You can find Links by searching for <a href=

Image Alt Tags
Content is king, but images show what you are talking about; it’s essential to add ALT tags to your photos for Search Engines and the visually impaired.
When a search engine crawls your website, they only look at the source code, so the only things they can see/read are the file names and alt tags.
You can find an image by searching for: <img src=

WordPress can add a lot of code to your images; you can also search for alt=".
Analytics
Often overlooked, in the excitement of launching a new website, people forget to verify the Analytics codes have been properly installed.
If you are using Google Analytics, you can find the tracking code by searching for “UA-“

Alternatively, you can use Google Chrome Google Tag Assistant Browser Extension. Or by using Screaming Frog’s Custom Extraction settings. This step is vital in checking that every page has analytics installed correctly.
No matter how well your website is organized, it can sometimes be difficult to find pages quickly.
I find XML sitemaps a great way to find and review pages. You can find your XML sitemap by going to your website then typing /sitemap.xml
E.g., domain.com/sitemap.xml

If you receive a 404 page, that means you have not installed an XML sitemap. Not having an XML sitemap could be hurting your search visibility. You can install one automatically by adding the Yoast Plugin for WordPress sites and using Screaming Frog to generate an XML sitemap for your static website.
After adding or installing a plugin, you will want to tell Google where it is by adding it to your Robots.TXT.

Final Word!
I hope you found this guide valuable. Feel free to ask me any questions or add suggestions below.
FAQ
How do 401 redirect pages affect SEO?
What is source code?
How do i find my sitemap URL?
Published on: 2021-03-20
Updated on: 2024-10-20