
In today’s digital age, understanding your website’s performance, traffic sources, and search query rankings is essential for growth. While Squarespace offers its built-in analytics, diving deeper with tools like Google Search Console can provide invaluable insights. Google Search Console, formerly known as Google Webmaster Tools, offers an extensive range of features, from monitoring your site’s search performance to discovering potential issues that might hinder its visibility. But how do you bridge the gap between this powerful Google tool and your sleek Squarespace website? In this article, we’ll walk you through a step-by-step guide on connecting Google Search Console to your Squarespace site, ensuring you harness the full power of both platforms.
Table of Contents
How to connect Google Search Console to a Squarespace website
Connecting Google Search Console to a Squarespace website involves verifying your site with Google and submitting your sitemap. Here’s a step-by-step guide to help you do this:
Set Up Google Search Console

- Go to Google Search Console.
- Click on ‘Start Now’ and sign in with your Google account. If you don’t have a Google Account, you can create one here.
- Click the ‘Add property’ button.
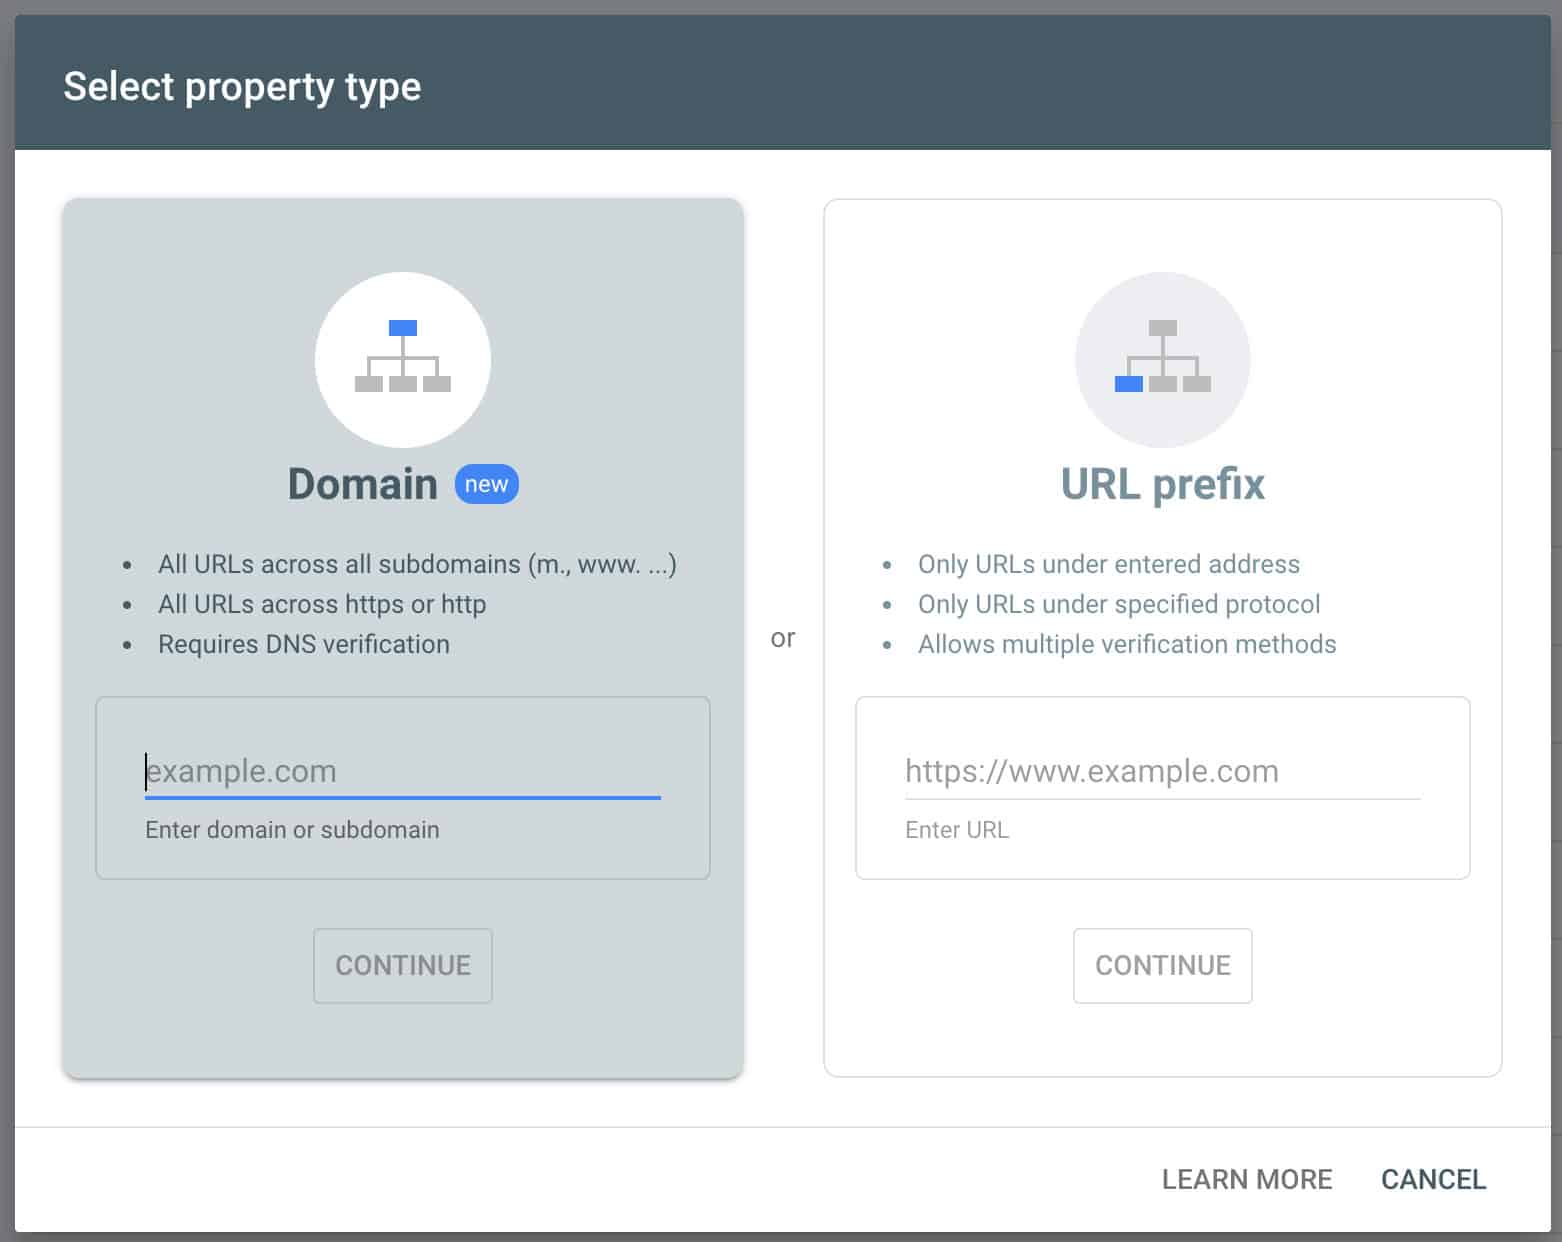
Enter Your Website URL
- You’ll see two tabs: ‘Domain’ and ‘URL prefix.’ For Squarespace, using the ‘URL prefix’ method is often easier.
- Enter your website URL in the ‘URL prefix’ field.
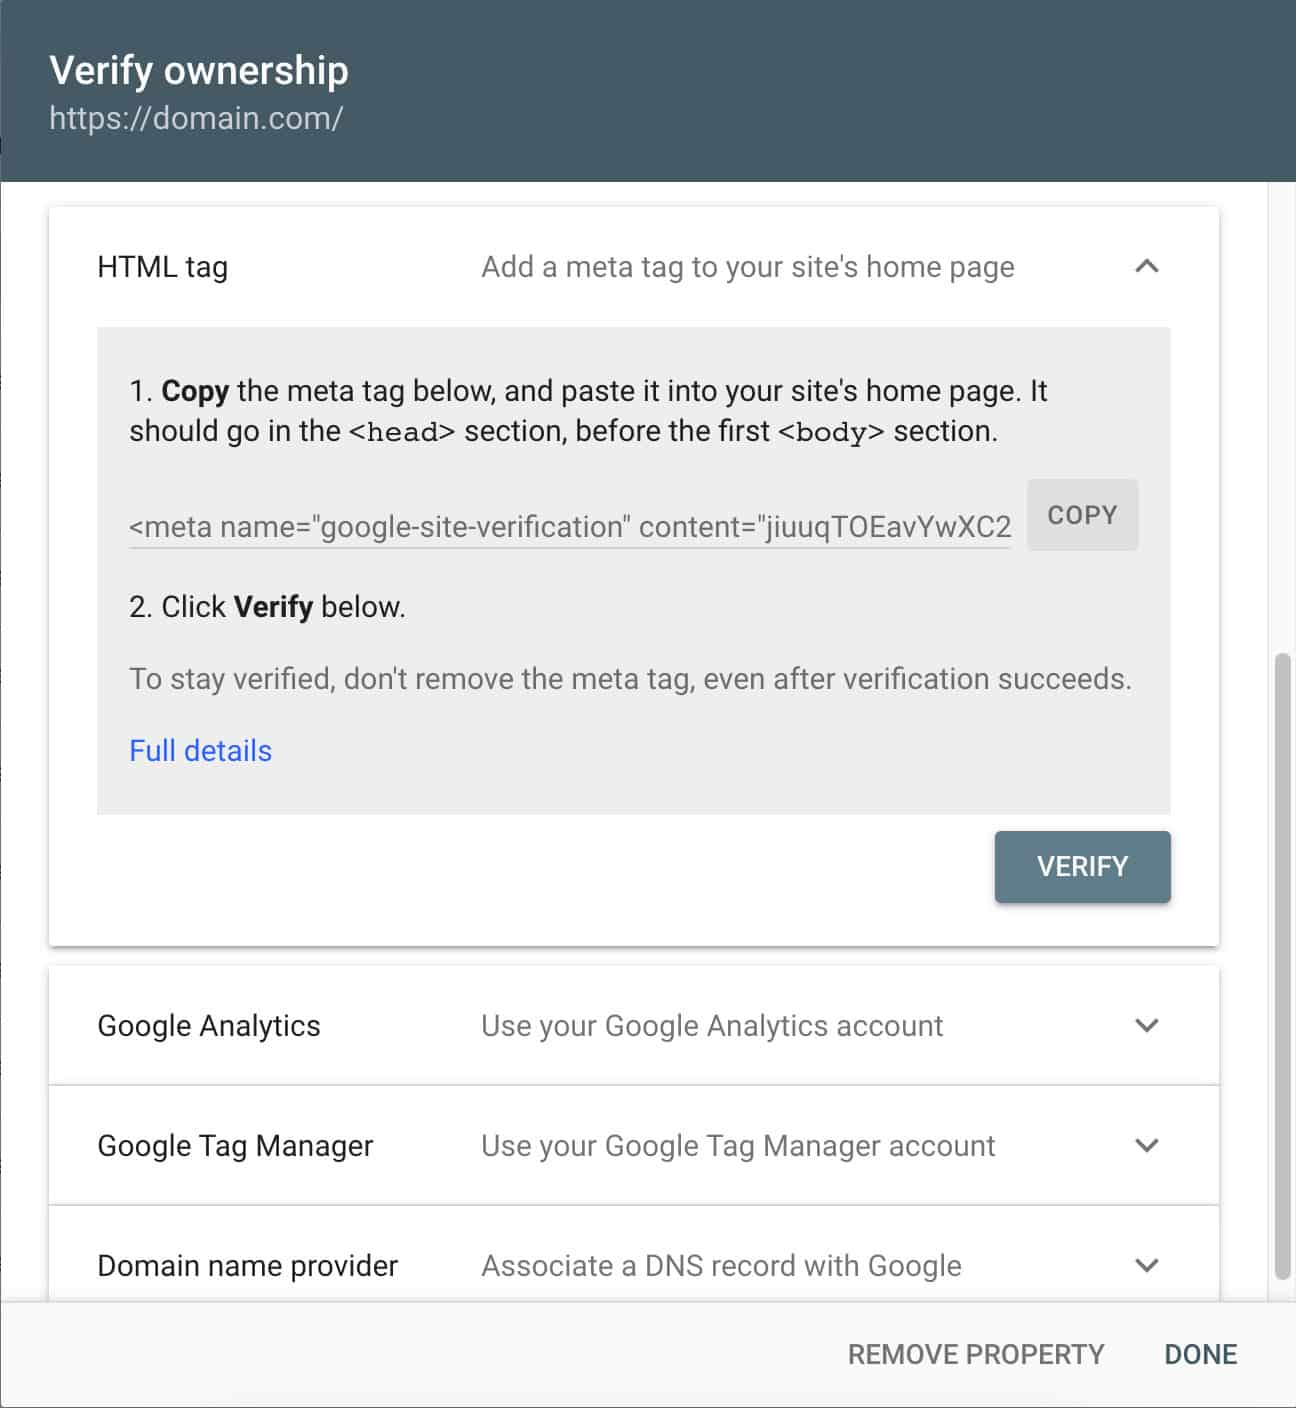
Verification

To verify your Squarespace site with Google, you’ll need to add a verification code to your website:
- In the Google Search Console, you’ll be provided several verification methods after you’ve entered your website. Choosing the ‘HTML tag’ is the easiest.
- Copy the meta tag provided.
If you already have Google Analytics installed, the verification process will automatically be approved.
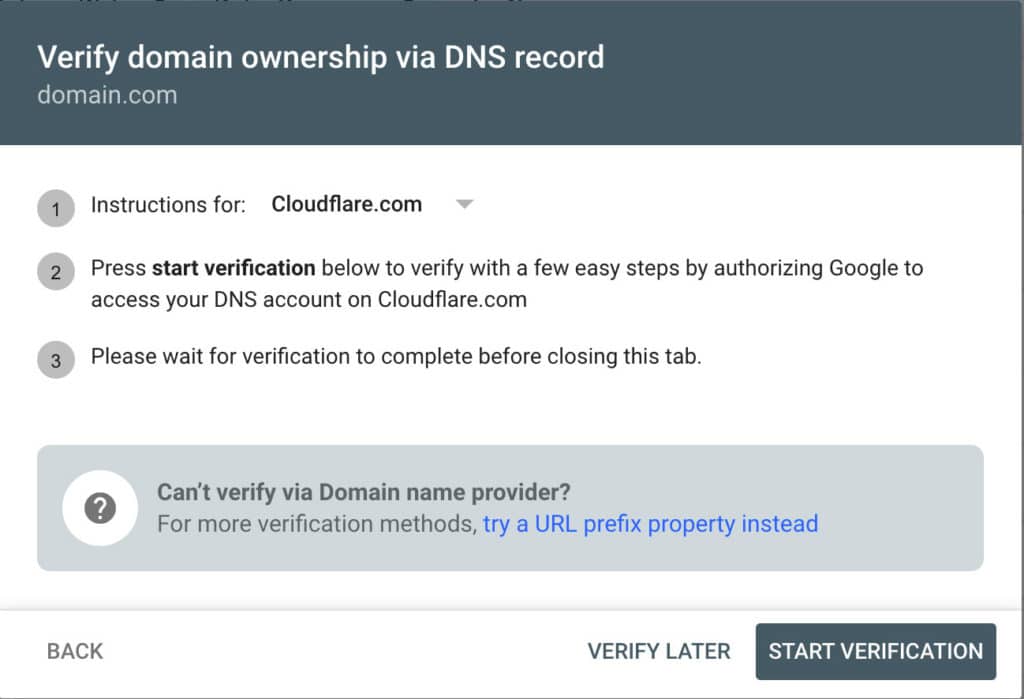
If you decide to use ‘Domain,’ you will need to add a DNS record provided in your domain registrar (e.g., GoDaddy, Namecheap, etc.) by following the online prompts.

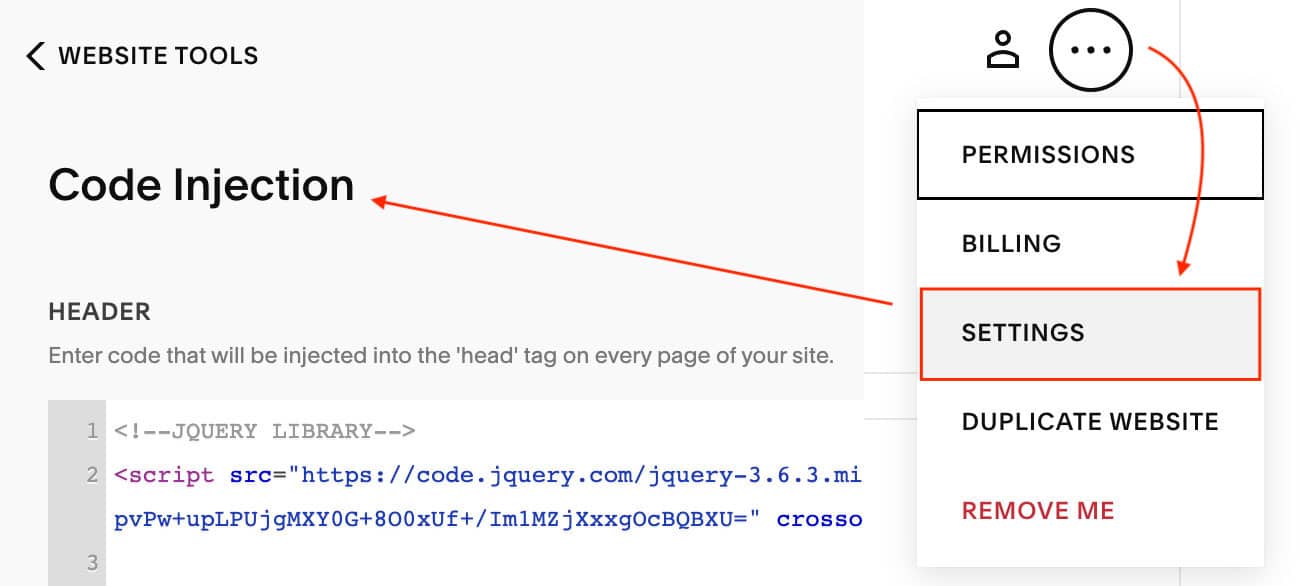
Code Injection

- Now, go to your Squarespace dashboard.
- Click ‘Settings’ > ‘Developer Tools’ > ‘Code Injection.’
- Paste the meta tag you copied from Google Search Console into the ‘Header’ field.
- Save changes.
- Return to Google Search Console and click ‘Verify’. If you’ve added the code correctly, your site should now be verified.
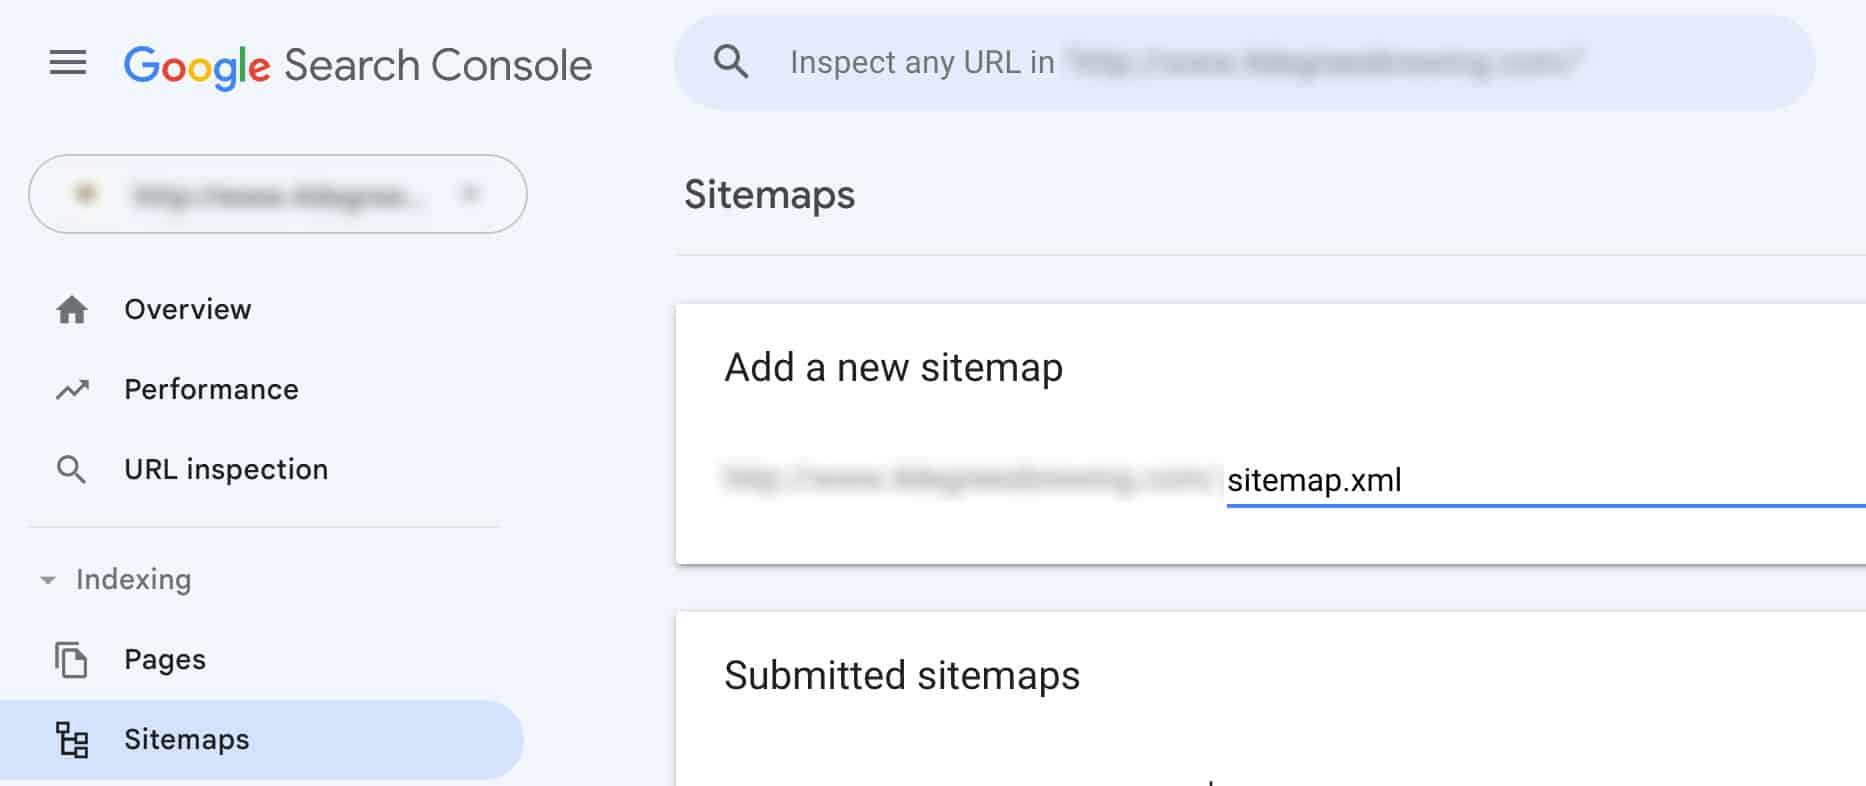
Submit Your Sitemap

After verification, you can submit your Squarespace sitemap to Google:
- a. In your site’s Google Search Console dashboard, click ‘Sitemaps’ in the left sidebar.
- b. In the ‘Add a new sitemap’ field, type “sitemap.xml” (without quotes) and then click ‘Submit.’ Squarespace automatically generates this sitemap for all of its sites.
Review Data

After a few days, Google will start to show data about your website, including indexing status, search queries, and more.
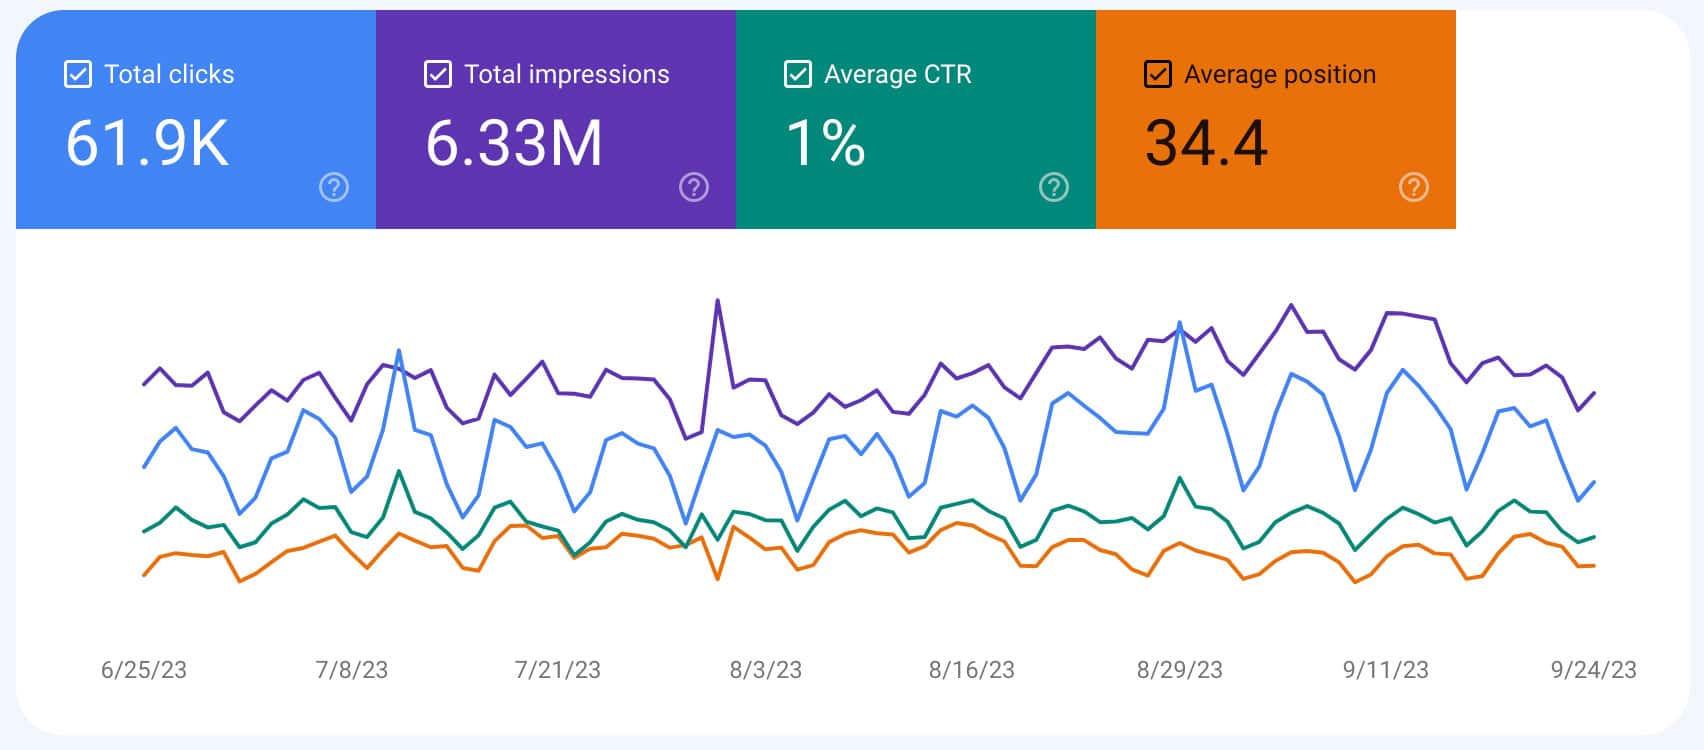
Remember, connecting your website to Google Search Console helps in understanding how Google views your website and provides insights into potential issues that might affect your site’s performance in search results.
Published on: 2023-09-26
Updated on: 2024-10-25